Set value with push buttons
Set a digital value
The Action SetDig sets the value of a digital signal to 1 when you click on an object.
To demonstrate this we create a button from a rectangle. By setting 3D and increase
shadow_width to 15 the rectangle will get a characteristic button look. Furthermore we add
the gradient DiagonalLowerRight with gradient_contrast 1 to increase the 3D effect. Finally
se create a group of the rectangle and are now able to specify an Action.

Fig A rectangle shaped as pushbutton
To set set a digital signal to 1 when pressing the button, we set SetDig in Action.
This means that is the signal value is 0, the value will be set to 1. If the value already
is 1 there will be no change.
We connect SetDig.Attribute to the signal H1-Dv1.
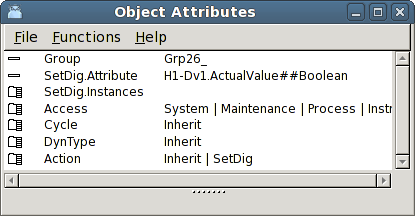
Fig Action SetDig on the button
The result is that when we click the button H1-Dv1 is set to 1.
It is possible to add several instances of SetDig and for each new instance you connect
a new signal that is set to 1 when the button is clicked on. In this way several signals can
be set with one mouseclick.
Reset a digital value
ResetDig works as SetDig with the difference that the signal value is set to 0.
We set Action ResetDig and connect to the signal H1-Dv1.
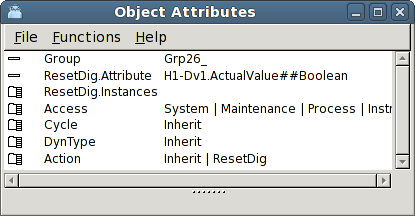
Fig Action ResetDig on the button
The result is that when we click the button H1-Dv1 is set to 0.
Toggle a digital value
With Action ToggleDig you change the value of a digital signal when clicking on the object.
If the value of the signal is 1, it is set to 0, and if the value is 0, it is set to 1.
We connect ToggleDig.Attribute to the signal H1-Dv1.
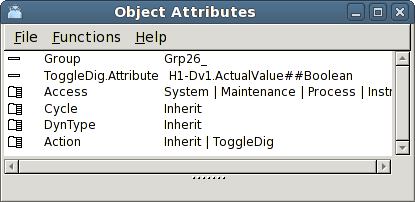
Fig Action ToggleDig on the button
The result is the the value of H1-Dv1 is inverted when the button is clicked on.
Set a digital value as long as the buttons in pressed
With Action StoDig you set the value of a digital signal to 1 when the button is pressed, and
reset to 0 when the button is released.
We set Action StoDig on the button an connect to H1-Dv1.

Fig Action StoDig
The result is that when we press the button, H1-Dv1 is set to 1, and when we release the
button H1-Dv1 is set to 0.
Pushbutton with confirmation
If you add Action Confirm to a pushbutton, a confirmation from the user is required before
the action is executed. When you click the button a popup dialog is displayed where you
either can confirm or cancel. The text in the window is stated in Confirm.Text.
Set an analog value
To set a value to an analog signal the Action SetValue is used. SetValue is connected to an
analog signal, and when clicking on the object a specified value is set to the signal.
We set Action SetValue on the button, and connect to the Av object H4-Av1. We want to set
the value 4.5 and insert 4.5 into SetValue.Value.
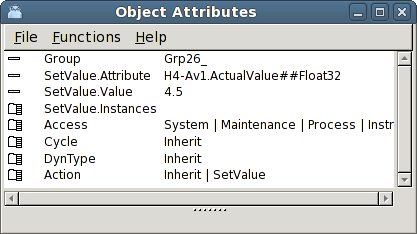
Fig SetValue
The result is that when we click the button the value 4.5 is set in H4-Av1.
Several instances of SetValue are implemented, and for each instance you specify a value and
connect the instance to an analog signal. It is then possible to set different values into a
number of analog signals with one mouse click.
Increase/Decrease buttons
With action IncrAnalog you can increase or decrease the value of an analog signal with mouse
clicks. IncrAnalog is connected to an analog signal, and in IncrAnalog.Increment is stated
the amount of the increment or decrement for each click. You can also state minimum and
maximum values for the signal.
We create a ButtonUp and a ButtonDown object from the Pushbutton map in the subgraph palette.

Fig ButtonUp and ButtonDown
Both have SetDig as default. We remove SetDig by unmarking Inherit in Action, and mark
IncrAnalog instead. We connect both buttons to the signal H4-Av1. The ButtonUp button should
increase the value with 1 for each click, and we set IncrAnalog.Increment to 1. ButtonDown
should decrease the value with 1, and we set IncrAnalog.Increment to -1. We also set min and
max values and set IncrAnalog.MaxValue to 10.
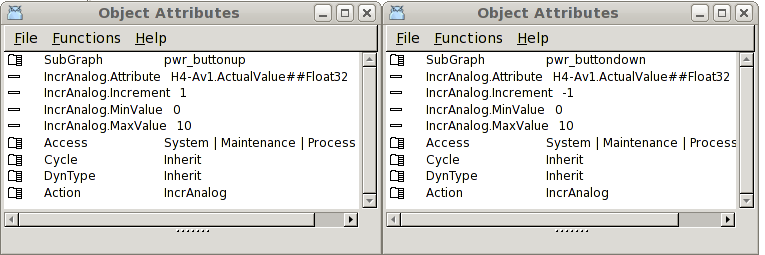
Fig ButtonUp to the left and ButtonDown to the right
The result is that when we click on ButtonUp the value of H4-Av1 is increased with 1 for
each click until the max value 10 is reached. When we click on ButtonDown, the value is
decreased with 1 until the min value 0 is reached.
Radio buttons
Radio buttons are used when you want to select one alternative from a number of alternatives.
For each alternative you create a radio button and connect it to a digital signal. Then
you group the radio buttons. The action RadioButton work in the way that the signal for a
radio button that is clicked on will be set, while other radio buttons in the group will be
reset. This means that at most one alternative is selected, and only one of the signals are 1.
We create four radio buttons of type RadioButtonRelief.
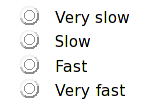
Fig Four radio buttons
They already have the action RadioButton as default. We connect the every radio button to one
digital signal each, H1-Dv1, H1-Dv2, H1-Dv3 and H1-Dv4. Then we group the four radio buttons
and add some suitable texts to describe the alternatives.

Fig The first radiobutton is connected to H1-Dv1
When we open the graph with the radio buttons in the operator environment, we can select
one of the alternatives. The selected one is marked with a black dot, while the other are
reseted. In the figure below the second alternative is marked, ie H1-Dv1 is 1 while Dv1,
Dv3 and Dv4 is 0.
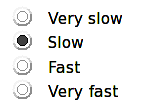
Fig A radio button is marked
Checkboxes
Checkboxes are used to mark a number of alternatives in a list. Contrary to radio buttons
several alternatives can be selected concurrently. A checkbox has the action ToggleDig
combined with the dynamic DigShift.
We create for checkboxes of type Checkbox2, and insert descriptive text close by.
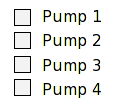
Fig Checkboxes
The checkboxes are connected to the signals H1-Dv1, H1-Dv2, H1-Dv3 and H1-Dv4. Note that
both DigShift.Attribute and ToggleDig.Attribute are connected to the same signal.
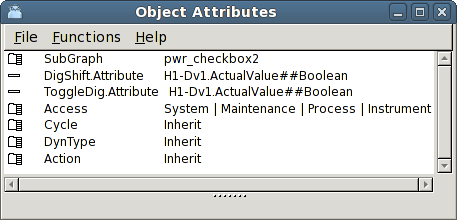
Fig Object editor for the first checkbox
In the figure below the first and third checkbox are marked, ie H1-Dv1 and H1-Dv3 are set to
1.
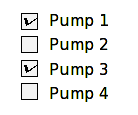
Fig Checkboxes marked