Rectangle
You draw a rectangle by activating the rectangle button in the tool panel, push the right
mouse button where a corner of the rectangle should be, drag with the mouse button pressed
to the opposite corner and release the mouse button. With the default settings, a rectangle
with black border is now created.
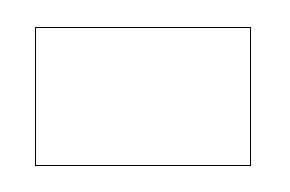
Fig Rectangle
We shall now have a look at how the appearance of the rectangle can be changed. In the tool
panel there are buttons for border, fill and 3D. They work in the way that if an object is
selected, the property of the selected object is changed. At the same time the current
setting is the default value for new objects that are created.
Object editor
By doubleclicking on the rectangle, a window is opened where you can set various attributes
of the rectangle. An attribute is changed by selecting the attributes, pressing key arrow
right (or Ctrl+Q) and inserting the new value.
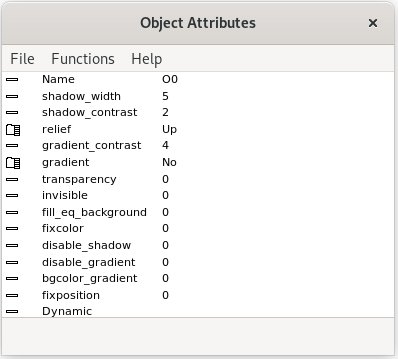
Fig Object editor
Fill color
We can fill the rectangle with color by clicking on the Fill button in the tool panel.

The color is changed by first selecting the rectangle by clicking on it, and the click on
the desired color in the color palette.
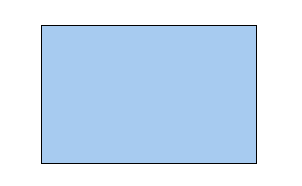
Fig Rectangle with fill color
Border
The border of the rectangle can be removed with the Border button in the tool panel. To
remove the border the rectangle has to be either filled or have a 3D frame. If the border
is removed, it can be added with the border button.

Fig Rectangle without border
Border width
The width of the border can be changed with the LineWidth menu in the tool panel. Select
the rectangle and set desired line width from the tool panel. The unit of the line width
is pixel, and a width between 1 and 8 can be set.
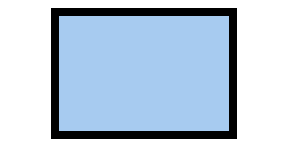
Fig Rectangle with broader border
Border color
Also the color of the border can be modified. Select the rectangle, activate 'Border' in the
color palette and click on the desired color.
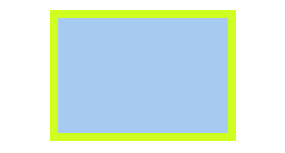
Fig Modified border color
3D
With the 3D button in the tool panel, a frame with relief effect is drawn on the rectangle.
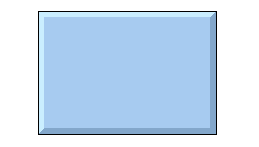
Fig Rectangle with 3D
The width of the relief can be changed with the attribute shadow_width. Open the object
editor by double clicking on the rectangle, and insert a new value in shadow_width. The unit
of shadow_width is in percentage of the width or height of the rectangle (the smallest).
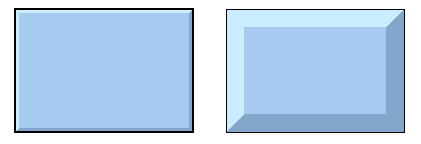
Fig Width 3 % to the left and 15 % to the right
You can also change the contrast of the relief frame with shadow_contrast. By increasing the
value to 3 the shade will be darker and the light border will be lighter. Valid values are
1 - 3.
Whether the relief is outwards or inwards depends on the attribute relief. With Up the
relief is outwards, ie the upper border is light and the lower dark. With Down the upper
border is dark and the lower is light, which gives the effect of an inward relief. You will
get the greatest relief effect if the relief is drawn with the same color as the background.
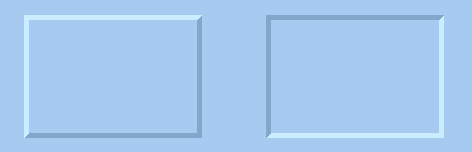
Fig Relief Up to the left and Down to the right
Gradient
With the three gradient buttons you can set a color gradient on the rectangle from lighter
to darker color tone.
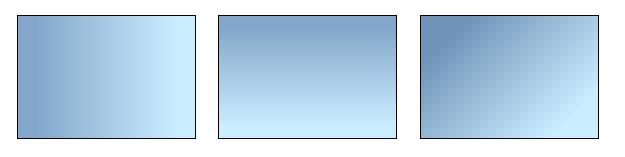
Fig Rectangles with various gradients
In the gradient menu there are 17 additional variations of gradients to select. Below
Horizontal Tube2 is shown that is suitable for cylindric items.

Fig Rectangle with gradient Horizontal Tube2
The contrast of the gradient can be affected by the gradient_contrast attribute in the
object editor. The contrast can have a value between 0 and 10.
Gradients with two different colors can be created by using the object background color.
- Draw the rectangle with a fill color.
- Attach a gradient to the rectangle.
- Open the object editor and set bgcolor_gradient to 1.
- Set the background color by selecting the rectangle and click with Shift+Ctrl MB1
on a color in the color palette.
Now the gradient will be drawn from the fill color to the background color.
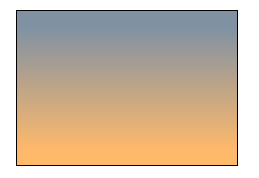
Fig Gradient between two colors
Set transparency
Transparency of an object is set from the object editor. Transparency is a value between 0
and 1, where 0 is no transparency, and 1 is full transparency.
Fig Rectangle with transparency set to 0.5
Draw a square
To draw a square with equal width and height you press Ctrl+E (Scale equal) before you draw
the rectangle. Reset Equal scale by right clicking in the work area.
Draw several rectangles
If you are going to draw several rectangles you can press the Shift key when clicking on the
rectangle button in the tool panel. Now you can draw several rectangles without clicking on
the rectangle button for each new rectangle. The function is reset by right clicking in the
work area.