System / Logging
With the logging function it is possible to log signals and values in the database to
a text file. The content of the textfile can be viewed in a curve window, or imported
into for example Calc or Excel.
Maximum 100 attributes can be logged in one logfile, and there are 10 entries, where each
entry handles one logfile.
Start the logging
- Collect the attributes that are to be logged, into the collection view, for example by
finding and selecting the attributes in the database and press Ctrl+V.
- Check with Ctrl+N that the correct attributes are present in the collection view.
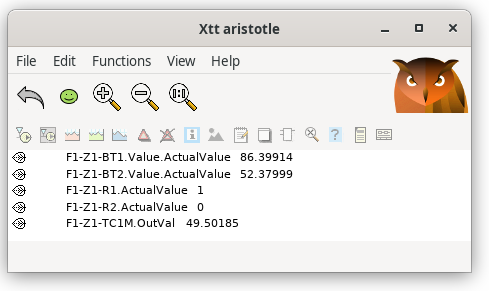
Fig Attributes collected in the collection view
- Open Logging entry 1 (System / Logging / Logging Entry 1).
- Click on the 'Insert' button, The attributes are now transferred from the collection view
to the list of attributes in the logging entry.
- Specify cycle time in ms, and filename if needed.
- Start the logging by clicking on the 'Start' button.
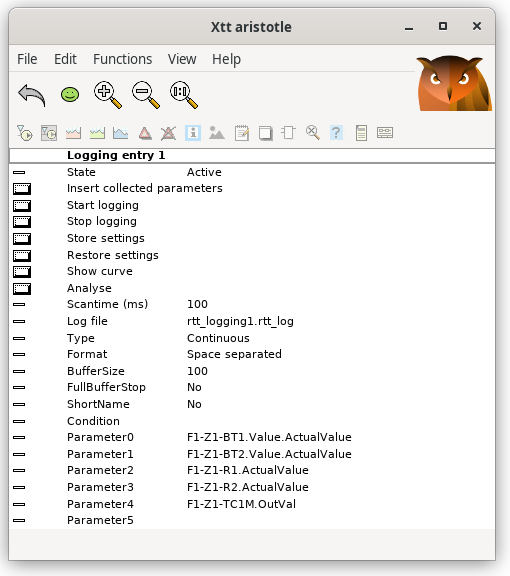
Fig Logging entry with logging started
- When the logging is complete, you click on the 'Stop' button. Note that you must not
terminate the navigator during the period of time the logging is active. Though you can
leave the loggentry page.
- Look at the logging result in the curve window by activating 'ShowFile'.
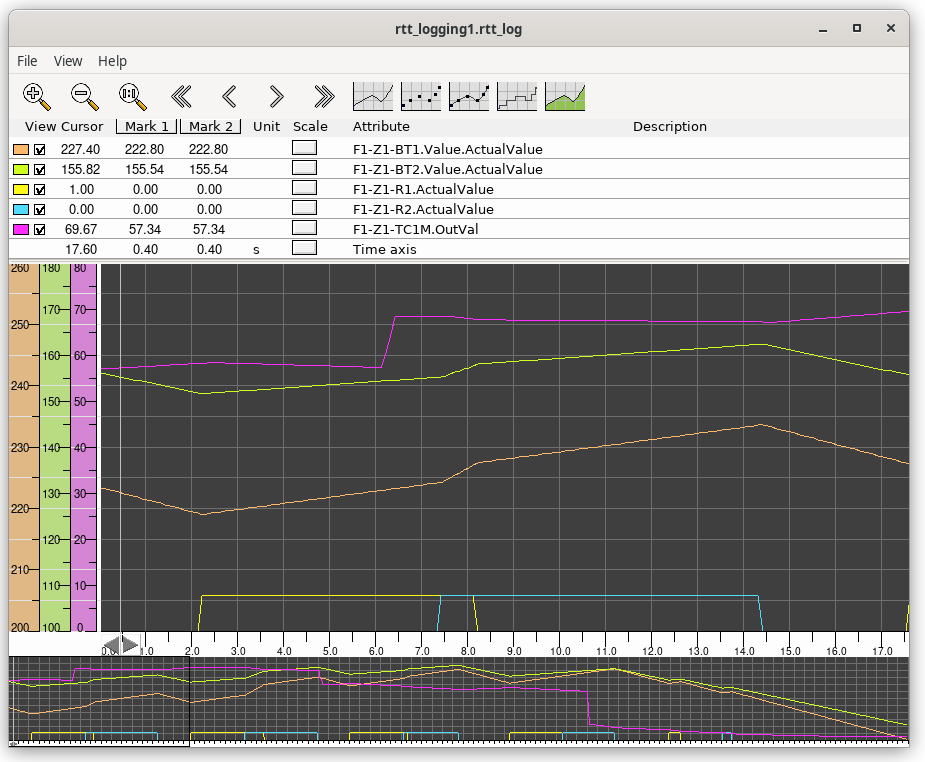
Fig Logging viewed as a curve
There are two types of logging. Either the value of the attributes are logged continuously
with a certain frequency (continuous logging), or an attribute is logged every time its
value is changed (event triggered logging).
Continuous logging
The values of the attributes in the entry are logged every cycle. In the file, also the time
since the logging started is written. The file can be viewed in the Xtt curve window
from 'ShowFile' or imported into a spreadsheet program.
Event triggered logging
An attribute in the entry is logged if the value of the attribute is changed. Into the
logfile the time of the change, and the new value is written. This type of logging can
not be viewed from 'ShowFile'.
Buffer
The logging is first written into an intern buffer. When the buffer is full it is written
to file. At fast time critical sequences, you can increase the buffer size to avoid
interruption when the buffer i written to file.
Conditional logging
In 'Condition' a digital attribute controlling the logging can be specified. The
logging is only performed when the ConditionParameter is true.
It is also possible to insert an expression into 'Condition'. The expression starts with
'expr' followed by the condition enclosed with parenthesis. In the expression, attribute values
can be fetched with the GetA function for analog attributes, GetD function for digital
attributes and GetI function for integer attribute.
Expression example
expr( GetD("H1-H2-Dv1.ActualValue") && GetA("H1-H2-Av2.ActualValue") > 2.5)
The logging is performed when the Dv 'H1-H2-Dv1' is true and the Av 'H1-H2-Av2' is
larger than 2.5.
Store
The logging configuration is stored with the 'Store' button, and can be restored later
with the 'Restore' button.